In a departure from my normal articles, I wanted to share a quick How-To that I found useful when setting up Pull Print or Secure Print with SAP Cloud, Public. The following example should illustrate the main steps involved in setting up the necessary queues and rules.
To get things started, I’ll first define a print queue with the name equal to my user ID.
Next, in the SAP system, I go to the Maintain Print Queues screen, filter as needed and select New. The New Print Queue pop-up appears.
From the drop-down menu, we will select the OMS for Pull Integration Queue type. By the way, that name has NOTHING to do with user pull printing. It is simply the method that VPSX uses to get the data from the Cloud (checkpoint polling).
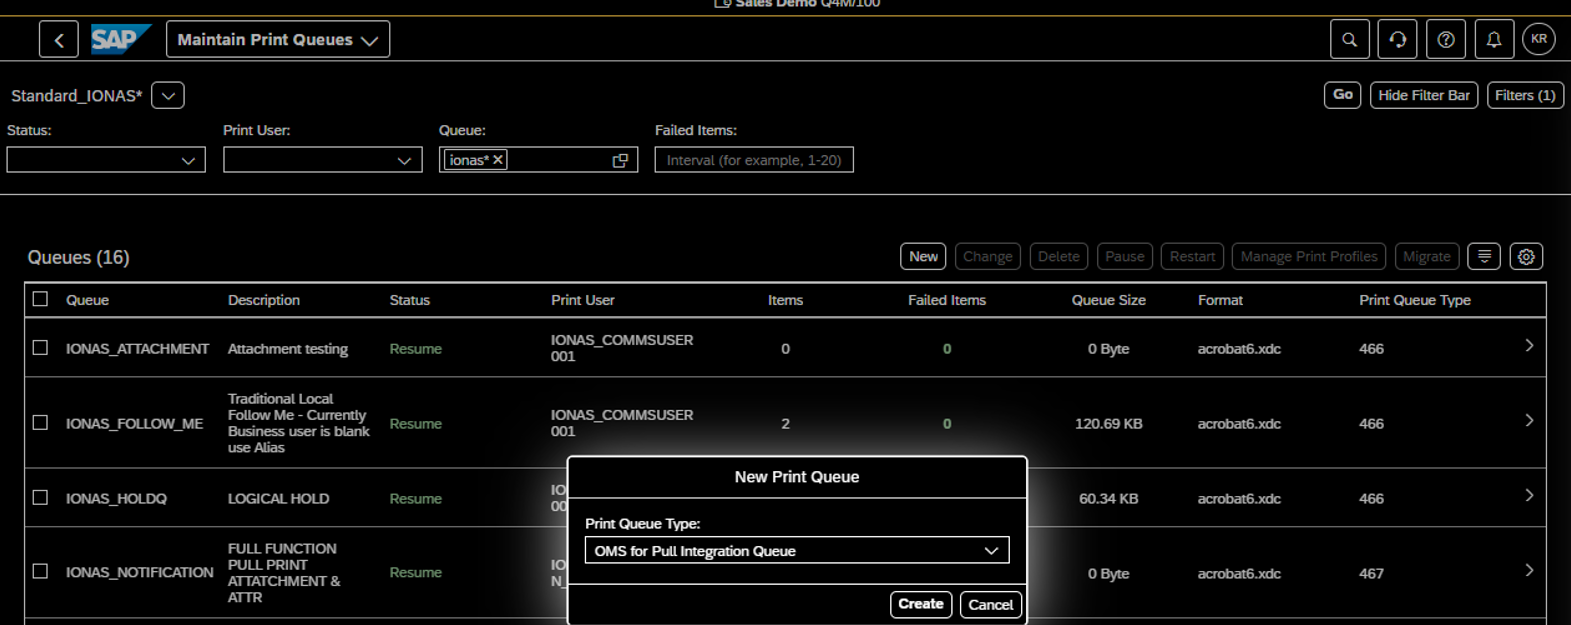
Next, type in the user ID of the person for which you want to enable pull printing and fill out the other fields as desired. Note that the comms user is set up once for your OutputManager Cloud instance.
If you have more than one user for which you’d like to set up for pull printing, repeat these steps as necessary. You could also choose the “Push” printing, but we recommend to use Pull printing to ensure Reliability, Availability and Serviceability (RAS).
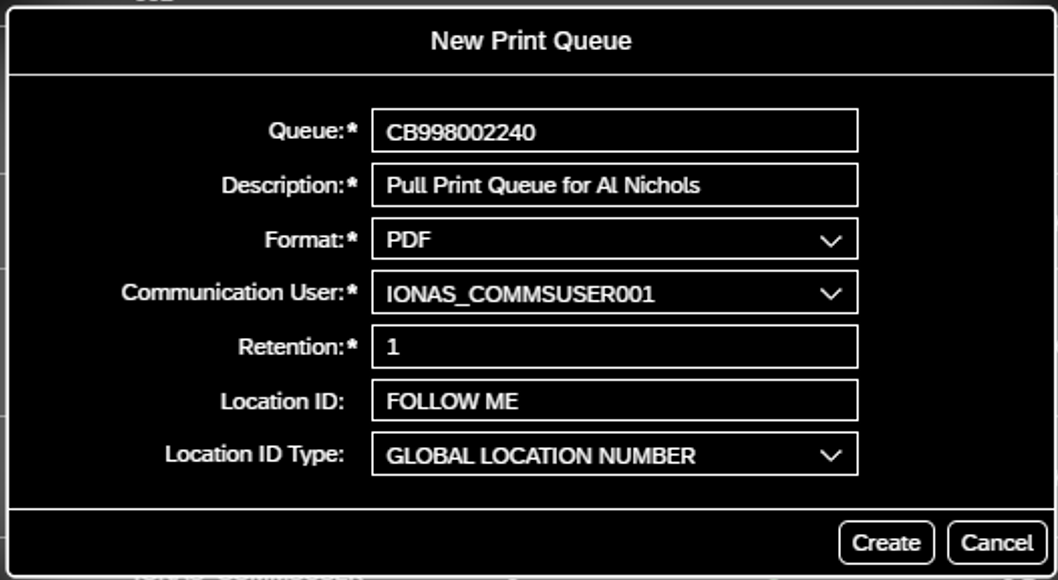
Once we have filled in all the information, we simply press create, and we are done creating the queue.
Next, let’s set up the rules for printing so that the user doesn’t have to search for their pull print device. To do so, we’ll use the Output Parameter Determination screen.
First, select the application the user wishes to use. For this example, we’ll try the Physical Inventory app and select Printer Settings from the Determination Step drop-down list.
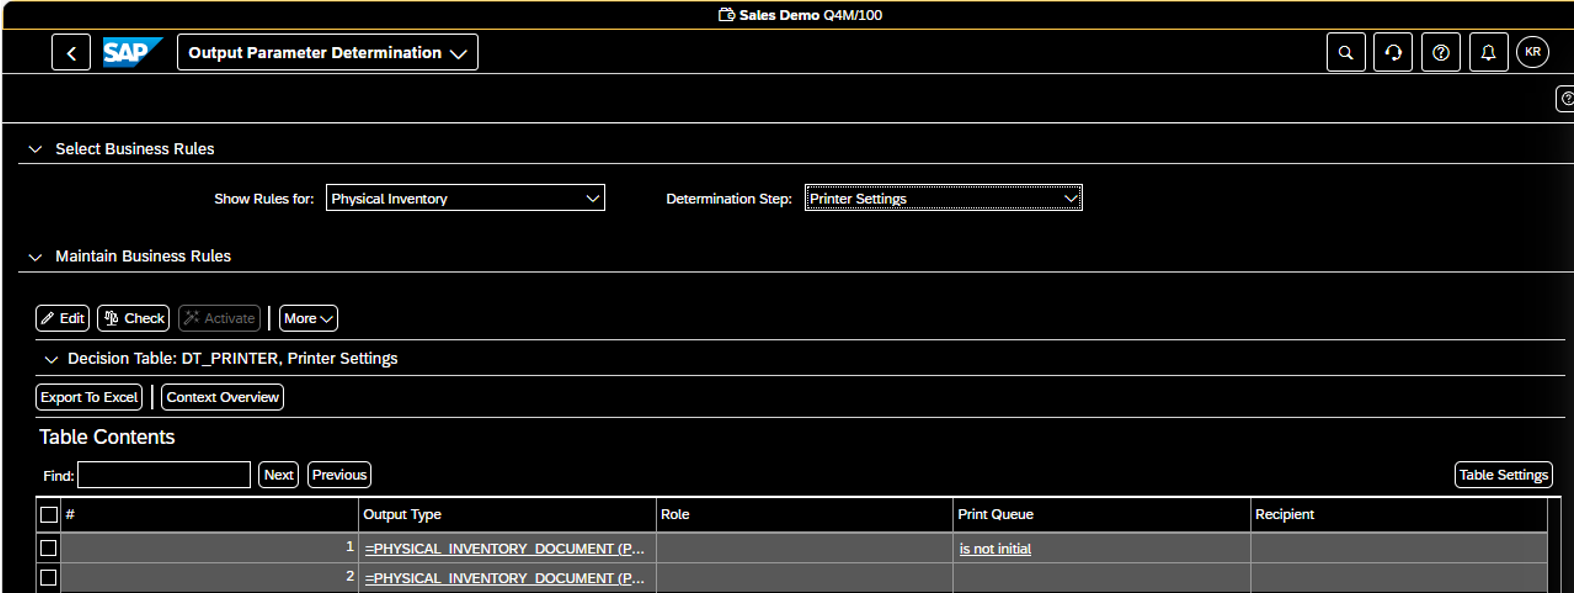
Scrolling to the right, we see the Print Queue settings. We’ll use the edit button to change the entries. The ruleset simply states:

If you have selected a printer in the dialog, then you can use that. If not, use the Print Queue name equal to the current user. Of course, you can roll your own at this point too…
Repeat this process for all relevant applications.
In the VPSX system, ensure that you have a VPSX/OutputManager Cloud licensed printer with exactly that Print Queue name. Tip: you can let this be auto-generated from the SAP definition if you want.
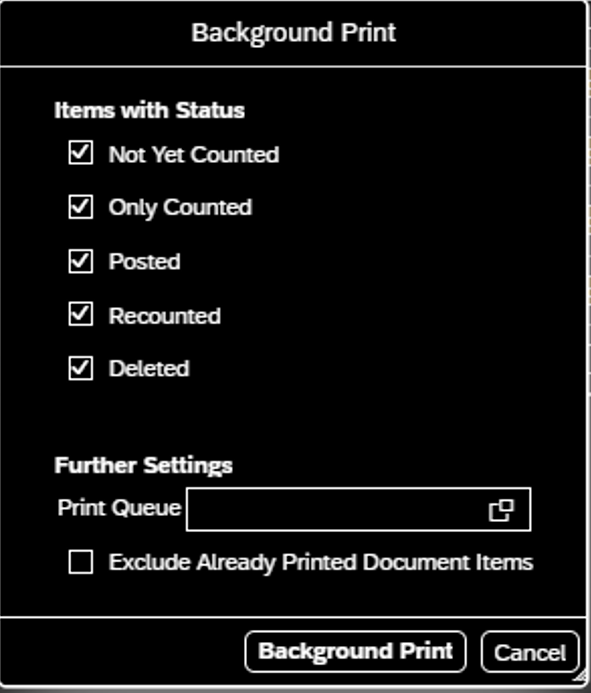
Now, let’s go to the Manage Physical Inventory Documents screen, which replaces the Print Physical Inventory Document screen. (However, you are still free to use the Print Physical Inventory Document screen if desired.)
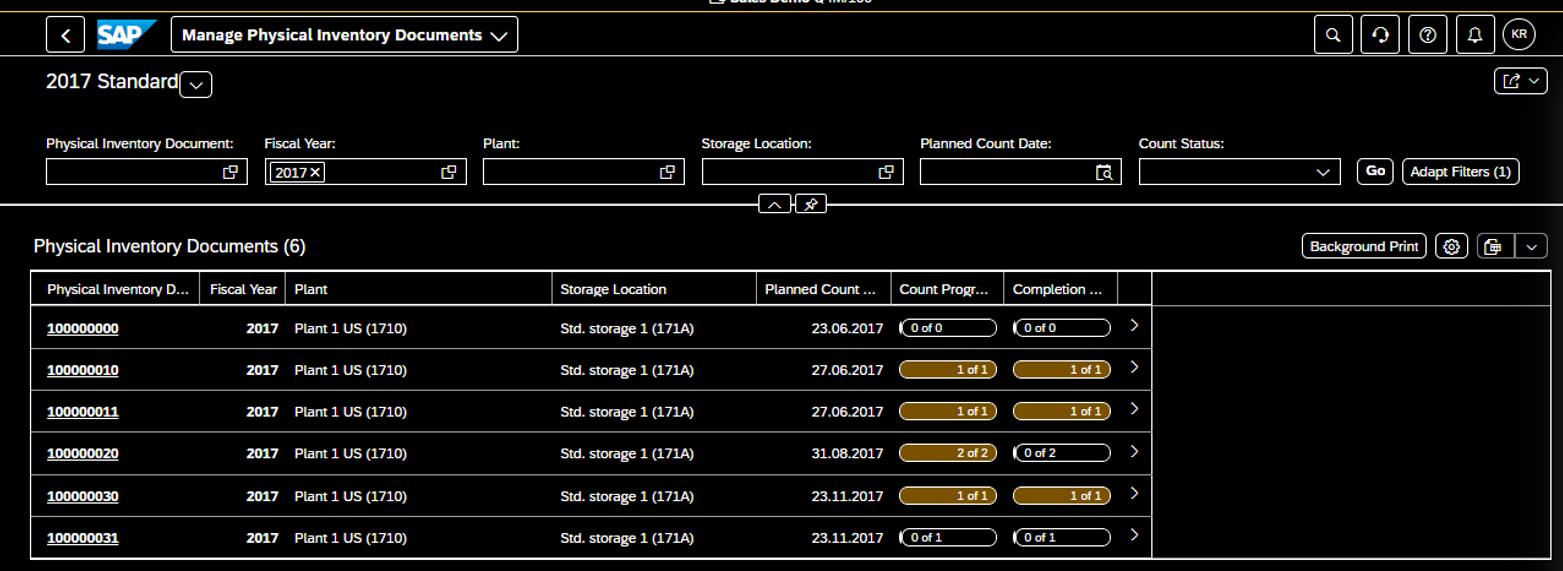
Select Background Print and DO NOT ENTER a printer name. Simply click the Background Print button.
If you now look in in the VPSX Web user interface, you will see the jobs. Note that the required meta data is all there, including any additional print options you may have set on that queue, encoded in the UserData1 field.

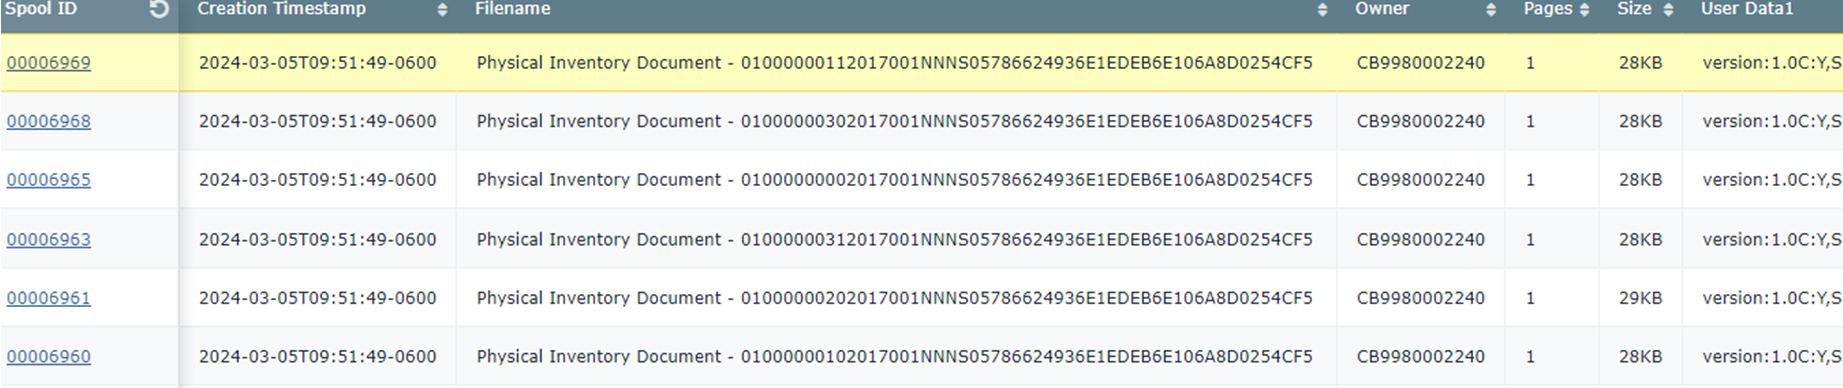
I’ll explore in a later Blog how you can leverage that field to initiate any required finishing, tray select, simplex/duplex or chrome options as well as the set up required on the Print Queue.
Now you can do anything you want with those print jobs. In our case, they are forwarded to the MFPSecurePrint Secure Print Personal Print Queue. Once authentication happens at the end device (by PIN or Card, Pin and Card or User and password), the jobs can be pulled down for printing.
Note that we have defined the CB9980002240 SAP business user in the MFPsecure user administration as an Alias to the user’s AD UPN.
I hope this has helped you understand the steps needed to set up pull printing from SAP public cloud applications. Happy printing, and as always…
Best Wishes from the Odenwald.
—Al